Contents
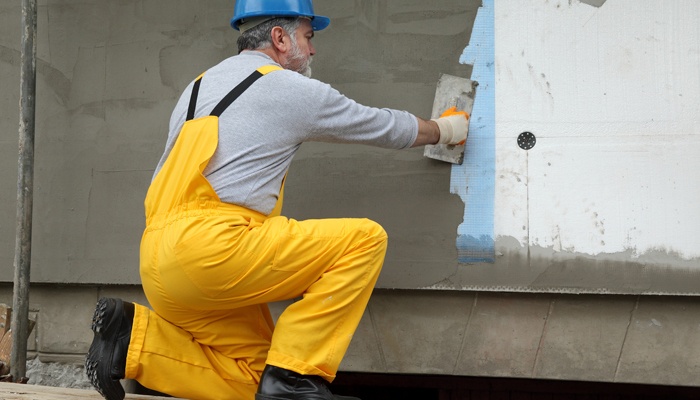
For warming of walls and a socle of the house often use inexpensive construction material – sheets of polyfoam. But open it is impossible to leave this easily destroyed material. It needs to be protected from negative impact reliably. As a protective layer plaster on polyfoam is usually applied. That warming served long, this work should be performed correctly. As why and than to plaster polyfoam outside, this article will prompt.
What polyfoam is suitable for plastering
Not to pronounce the long word "expanded polystyrene", it was reduced to the word "polyfoam". Also designate it by three letters – PPS.
This material has such advantages:
- low heat conductivity (below, than at a minvata);
- small body weight;
- resistance to settling by microorganisms;
- environmental friendliness;
- small cost.
Carry to minuses:
- small mechanical durability;
- low vapor permeability;
- appeal to small rodents, birds, wasps, bees;
- low thermal stability;
- susceptibility to disintegration under the influence of UFL;
- lack of fire resistance.
According to the production technology happens:
- press PPS (porous sheets with a smooth surface);
- bespressovy PPS (the oval or round granules which are stuck together at agglomeration).
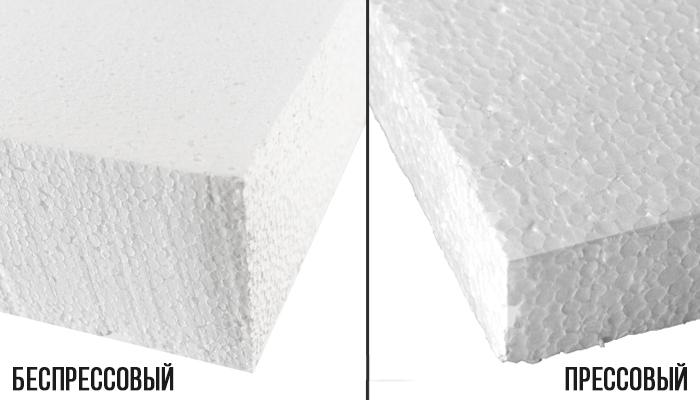
Bespressovy polyfoam is fragile, paropronitsay, however its granules do not absorb water. The moisture accumulating between granules then can come to plaster which collapses from it quicker. Using press PPS, it is possible to avoid such trouble.
Besides, it:
- is stronger;
- has rather low heat conductivity;
- it is convenient for transportation;
- does not burn;
- it is cheap;
- it is durable.
For warming under plaster there are special types – PSB-S-25, PSB-S-15.
Whether it is possible to plaster polyfoam and for what it is done
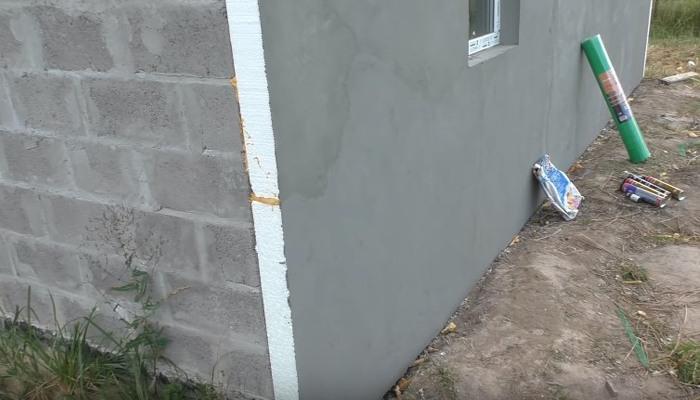
Polyfoam is popular as the warming material. However because of continuous temperature drops, humidity of the environment, under the influence of UFL the structure begins to collapse over time. Protection against these factors is easily provided by a plaster layer. Finishing of a facade polyfoam and the plaster protecting fragile material is considered the most successful decision for warming of walls of the building outside.

Advantages of the decision:
- the reinforced plaster layer protects fragile material from mechanical influences;
- access to sunshine is blocked;
- access to moisture is blocked;
- the fire safety as the plaster covering does not ignite increases;
- the barrier for insects and rodents is formed;
- the appearing lamination absorbs noise better and interferes with volatilization of heat.
Than to plaster polyfoam
Proceeding from the tasks solved by plastering, the choice of plaster is made in favor of structures:
- strong;
- tenacious (high-adhesive);
- durable;
- for external works or universal if exterior finish is made (if warming is carried out indoors, any kinds, first of all – are suitable for internal works).
Plaster structures outside (for front works) do not suit for polyfoam plastering.
Plaster for polyfoam – specially developed structures for a covering of materials from expanded polystyrene, for example, of Ceresit, Ekomiks, Stolit, contain the additives increasing adhesion with PPS. There are separate types of mixes intended for performance of concrete works:
- for gluing of sheets of polyfoam on the basis;
- for protective plastering of sheets PPS;
- universal.
Simple plaster structures on a usual cement basis, though are cheaper, however are not elastic, capable to become covered by cracks easily. If we warm the house, durable monolithic coverings are necessary. Except special structures also use usual on a mineral or synthetic basis.
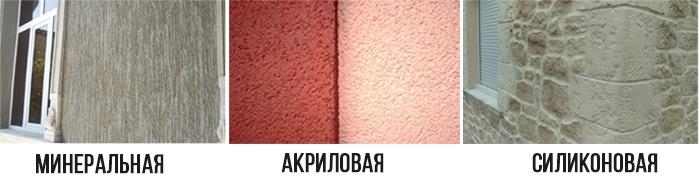
Plaster mixes on a basis happen:
- mineral (quite strong, nonflammable, resistant to UFL, vapor-permeable, eco-friendly and cheap structures on the basis of plaster, clay, lime, cement);
- acrylic (strong structures on the basis of acrylic pitches, more expensive, are less firm to fire, water-repellent, with a rich coloring, easily fade in the sun, do not give shrinkable cracks);
- silicone (the most expensive, strong, very elastic, vapor-permeable, resistant to UFL, the most durable).
Features of plaster on polyfoam
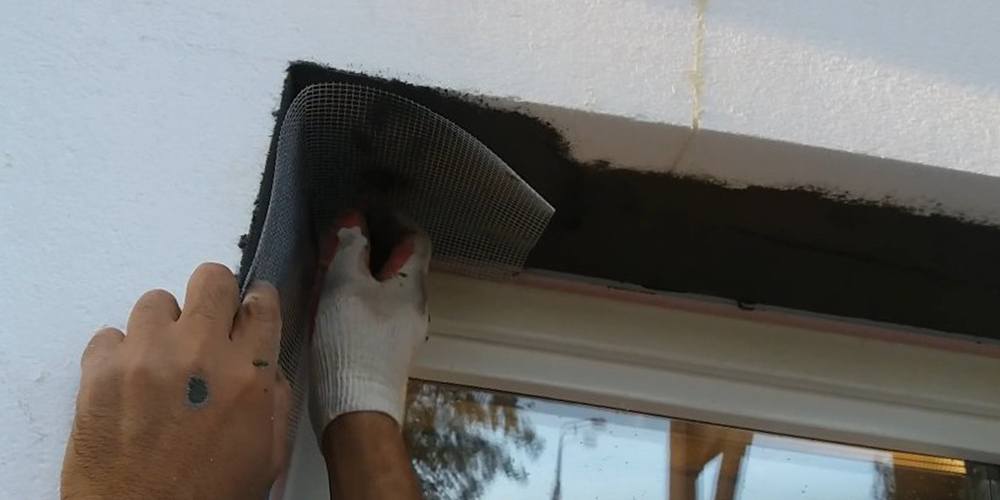
– existence of special mixes we already studied the first feature. The second feature – polyfoam plastering. This work is performed with application of the reinforcing grid. Without it the sufficient mechanical durability of a covering of soft PPS is improbable.
Third "strangeness" – the surface of plates of heater is not covered with primer. Plastering on expanded polystyrene – work quite simple, but effective. Materials are cheap, plain in application.
The nuances are available also when plastering internal thermal insulation and a facade.
On a facade
From the beginning of use of polyfoam there were developments of buildings in which facing is made of different materials.
The most successful is the technology called "a wet facade" – a construction of multilayered "pie" in which materials of each layer perform the function:
- facade primer under plaster;
- glue plaster weight;
- layer of sheet heater;
- plaster (glue) solution;
- the reinforcing grid;
- the leveling plaster layer;
- primer layer;
- finishing covering.
External facing by polyfoam – the most reasonable and correct decision, as in this case:
- The dew point (the place of formation of condensate) is taken out out of borders of the room, being placed in sheet heater where to be formed to condensate there is nothing.
- In this case the room also does not lose the volume.
- There is an accumulation of heat, rooms cool down much more slowly.
However, there are cases when to place sheets of polyfoam under plaster of a facade there is no opportunity.
Indoors
Warming and plaster of walls on polyfoam in rooms are applied in case:
- other buildings, or this warming and plaster of the balcony (loggia) located at big height outside are close located not to approach a wall, for example;
- the building is recognized as a historical monument;
- it is forbidden by rules for registration of houses in the center of the settlement.
Besides polyfoam indoors can it is required for warming of slopes of an entrance door and also if there is no opportunity to warm slopes of windows of the apartment outside.
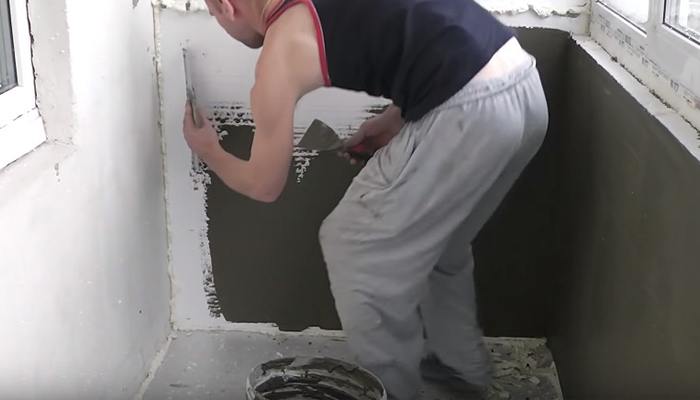
When warming walls in the building preparatory work carry out same as well as before usual plastering. Then paste polyfoam, fix a grid and plaster the same as on a facade. The finishing stage if walls are painted or pasted over with wall-paper, then especially smooth surface is required can be difference here. On the leveling plaster layer imposed on PPS carry out a shpaklevaniye, then dry.
Technology of plastering
It is time to tell about how to plaster polyfoam. Because of the conditions of curing demanded for plaster structures, works with plaster are performed at humidity to 60%, temperatures not above +30os, not below +5os. If plaster facades, then choose windless dry weather.
The plastered surface is pritenyat, closed from a rain a canopy. During the work in the socket and switches on the plastered wall cut off power. It is impossible to use heaters and fans for drying of the plastered wall.
In operating time apply means of protection.
Plastering stages:
- Make measurements, count the need for materials (safety factor – 1.2).
- Buy materials: the primer, plaster mix reinforcing elements.
- Prepare tools, devices.
- Prepare a surface.
- Prepare solution.
- Mount polyfoam.
- Cause plaster (glue) structure, the reinforcing elements fix.
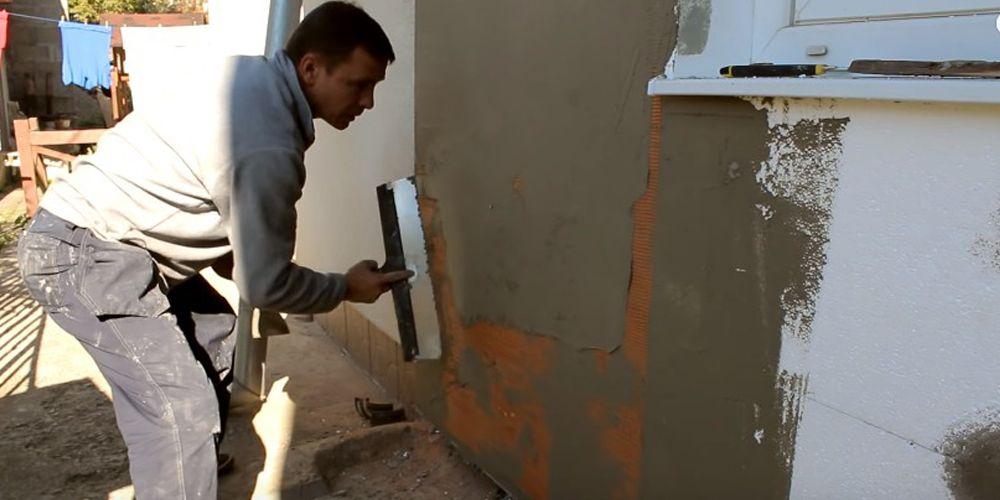
- Put the leveling plaster layer.
- Rub clean.
- Putty.
- Prepare a surface for finishing finishing.
- Carry out finishing finishing by decorative structures.
- Paint.
It is desirable for beginner to learn to work as the pallet both hands. In this case it is possible to change a hand when she is tired, without taking a break in work. The pallet when putting solution hold at an angle to a wall, without pressing too strongly. At most pressing mix layer thickness depends. Solution is applied on the middle of a working surface narrow with spatula. Clean with it the wide pallet from the remains or surplus of mix deleted from a wall.
During the work with decorative plasters the working surfaces of the pallet and a trowel regularly clean from residues of plaster mix, wipe damp rags. It interferes with formation of the grabbed lumps and dab polosatost caused by them. Many decorative structures do not suffer when they in them dump the surplus of solution removed from a wall as surplus becomes the centers of the accelerated crystallization of plaster mix. Surplus or applies at once on a wall where mix is not enough, or throws out.
The tool and materials for work
It is necessary to prepare in advance:
- the short-haired roller (it is required for priming);
- construction mixer;
- pallets with a metal plate;
- trowel or trowel;
- plastic grater with the attached nazhdachka;
- corners plastic with the reinforcing grid;
- gear pallet;
- scissors for cutting of a grid;
- level;
- capacities under solution and water;
- brush;
- plaster mix (or several types);
- primer;
- fiber glass grid;
- painting adhesive tape.
And the pallet is better to take a trowel with the rounded-off corners. Especially important it for putting decorative plasters.
Mix preparation
Usually rather in detail process of preparation of solution is described by the producer on packing of goods. From dry mix solution prepares before drawing.
Stages:
- in the container with juicy cold water fill up all powder which is available in packing (that all batches had the identical maintenance of components);
- weight is mixed the mixer before formation of the uniform test;
- cover, leave to infuse for 5-15 minutes (after that neither liquid, nor solids can be added already);
- repeatedly mix.

Ready mix before to plaster on polyfoam, it is necessary to mix too to lift the settled heavy particles.
If when hashing by the solution mixer in capacity on the parties splashes scatter, it is possible to change the direction of rotation of a nozzle of the mixer, having switched the mode. Then mix will lean back to the center of capacity.
Preparation of the basis
Responsible stage. The flatness and service life of plaster "armor" depends on quality of the performed work.
Before gluing of sheets of heater the wall is prepared, as usual:
- delete an unusable old covering, force down big ledges;
- splitting off and cracks "heal";
- clean the basis from spots of various origin (wash away water, dry, process specifics);
- from a surface delete dust, the remained metal objects isolate oil paint;
- establish a socle profile on level;
- mount sheets of polyfoam (on glue with fastening by expansion bolt shields).
Sequence of preparation of the foam basis:
- check flatness of all surface (the joined sheets PPS have to be at one level), carrying out on a wall by the rule;
- ledges accurately cut off, joints smooth out a nazhdachka;
- delete dirt, dust from a surface;
- for increase in coupling the top of polyfoam is rolled the needle roller (solution will get into the formed openings when plastering).
But where mechanical loadings can be raised (on human height height), primer for polyfoam superfluous will not be. It is possible to cover walls betonokontakty or Tserezity. After plastering (under finishing finishing) the warmed wall is grounded.
Closing of seams
Seams between sheets PPS have to be filled with polyurethane foam that cold bridges were not formed. If polyurethane foam in joints acts over PPS, it is cut off (seams have to be completely filled). If seams turned out big, fill them with the strips of polyfoam of the necessary width put on foam.

The choice and fastening of the reinforcing grid
The integrity and durability of a plaster armor is provided with the reinforcing grid. Strictly speaking, the reinforcing grid is necessary only for increase in physical durability of a plaster armor. And, where mechanical blows are possible. It is area of a wall up to the height of 1.5-2 m from the Earth's surface (on a facade) or a floor (indoors). Above it it is irrational to apply the reinforcing grid as it is unnecessary expenses of time, forces and means.
Plaster itself is capable to keep is tenacious, to protect PPS from UFL and a rasklyovyvaniye birds. And here in a problem zone where human activity can lead to violation of a plaster coat, a grid – need.

The usual serpyanka is no good here. Do not use also metal gauzes as because of rigidity it is impossible to level them, as a result thickness of a plaster layer increases. Apply a fiber glass mesh cloth of different density to reinforcing (depends on the size of cells, thickness of threads).
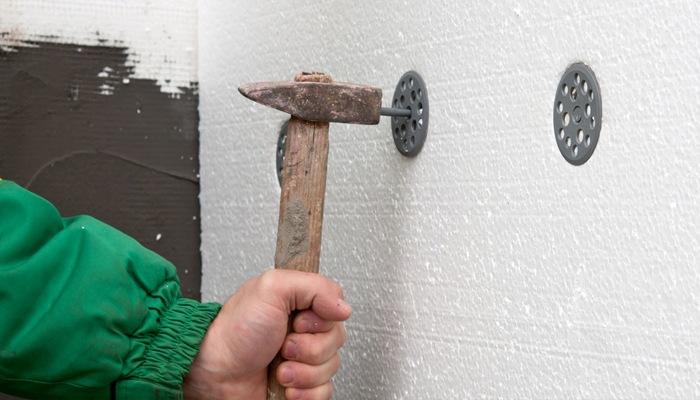
Before installation of a grid all fixing PPS expansion bolt shields with hats utaplivat ("parachutes") so that the foam surface had no ledges. After an utaplivaniye of deepening close up glue solution. One more subtlety – before works on a wall draw the line specifying height of installation of net reinforcing. Do it for economy of glue mix.
Begin reinforcing with installation of the punched corners with a grid on building corners and also reinforce the sites having difficult geometry.
Work stages:
- Prepare corners (cut on length).
- Prepare solution.
- The pallet or a trowel from two parties apply on a corner with a continuous strip solution (do not level). Impose a corner, slightly press, check vertical position level. Press a corner, straightening, in solution, smooth a grid on its parties with the pallet (in a downward direction and from a corner – in the parties). Try to obtain that the corner and an adjacent grid were evenly deepened in solution (where it is necessary, solution is added), remove surplus of plaster mix.
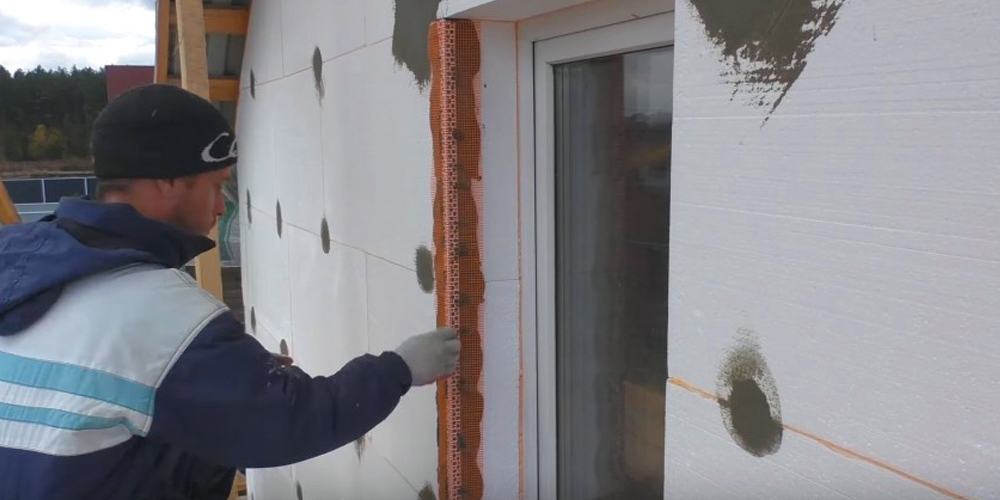
- Having processed corners, undertake reinforcing of slopes – measure and cut off corners of the necessary size. If width of slopes correct, reinforce as it is described above. Otherwise corners impose separately (similarly described on solution with adjustment of vertical position), and cut a grid a strip, at 1-1.5 cm wide already, than a slope. "Paste" on solution, without reaching 5-7 mm an angular edge. The strip of a grid is smoothed lengthways, then from the center.
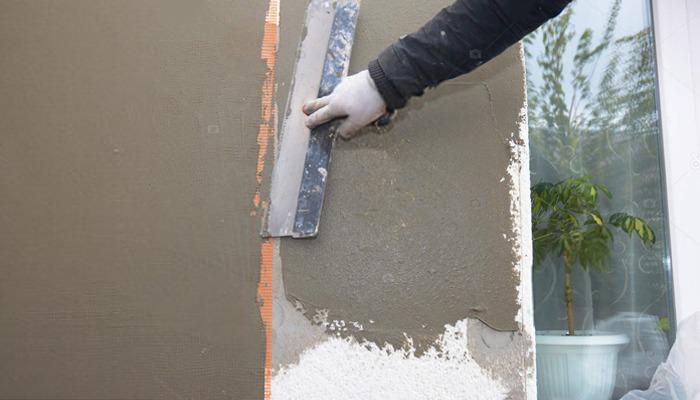
- Flat sites of a wall reinforce in the last turn. As it is difficult to paste and level big panels, a grid cut strips length meter - one and a half. It is simpler to beginners to work with small cloths, then they manage to impose and smooth a grid before drying of solution. If to work slowly, then solution will dry up, it should be deleted and put new. On a wall, having begun from a corner, impose a continuous strip of solution (from the nacherchenny line down). The strip sizes same, as at a grid cloth. Thickness of a plaster coat ~ 2-3 mm. On solution impose a grid, being guided on the line, nacherchenny on PPS, and vertical of a corner.
Press a grid hands to solution in several places and check correctness of its situation. After that, applying the pallet, the panel is pressed to heater. Begin to press down the first panel from the center down and in both parties. Do it so that over a grid solution acted through cells. When smoothing a grid the pallet, watch that it completely rolled in solution. Where plaster appears insufficiently, over a grid apply a little solution with spatula that it disappeared completely.
Some masters advise not to paste at once edge of a grid in places of a joint of panels (the recommended overlap – 10 cm). It only complicates reinforcing. Paste all grid. Then it is not necessary to rumple it and the following layer of solution will lay down without problems. It will increase speed and will increase accuracy of work.
- The following cloth is imposed also, only the edge it is shifted that it came on edge of the previous cloth with an overlap. Level the lower cloth on top. Smoothing down a grid, watch that there were no flows, deepenings, strips were not formed. The surface has to be equal. Excess mix is removed.
- Having pasted the lower grid, the excess lower part of a cloth is cut. The ends of a grid have to be closed by solution. Then the covering will accurately look.
It is necessary to calculate arrangement of a grid so that its joints did not get on PPS seams.
Zatirka of a surface
After attachment of a grid give to a layer day on drying. Then the surface is rubbed clean, but not the same as after putting the leveling plaster which becomes on hardly grabbed layer. It is not necessary to wet a wall. It is necessary to polish only sharp ledges that they did not prevent further finishing.
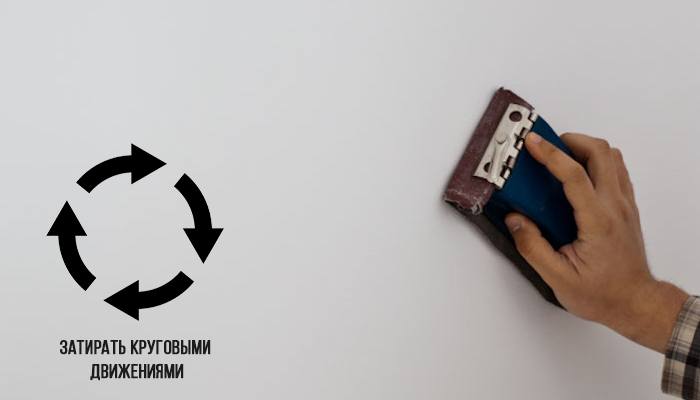
Apply for this purpose a grater with the attached emery paper.
The granularity is selected according to a type of future covering:
- under decorative structural plaster – a skin with large grain;
- under painting, wall-paper and a thin layer plaster covering – fine-grained.
The grater is imposed flatwise on a wall, a little pressed and driven round with equal pressing, without lingering long on one place. After the termination of a zatirka of all surface from a wall delete dust.
Finishing alignment
For this operation solution is shut more liquidly. Apply on a wall with an even layer up to 3 mm, applying the wide pallet. When drawing is finished, the layer is dried up and rubbed clean again. Then delete dust.
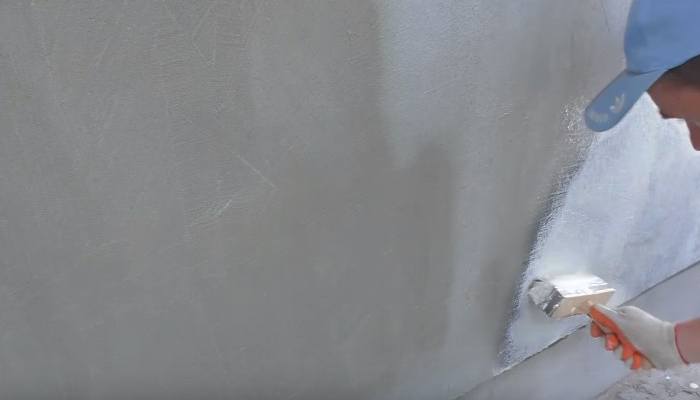
Preparation before drawing a decorative layer
Apply primer with the roller and where it is inconvenient to work with the roller, apply a brush. Layers of primer can be one or two. It depends on rigidity of climatic conditions. Each layer of primer is dried by not less day. The priming structure is selected according to the mix used for plastering and material of a finishing covering.
Finishing finishing on so thin plaster coat cannot be carried out colourful structures which can destroy polyfoam.
The colourful structures containing are no good:
- benzene;
- toluene;
- drying oil;
- acetone;
- xylol;
- pitches coal or polyester;
- gasoline or kerosene.
Putting decorative plaster
Solution of decorative plaster should be prepared according to the instruction. It is applied wide with spatula or a trowel a thin layer. Thickness of a plaster coat is usually equal to diameter of grains of filler. It is not recommended to apply heavy structures, for example, a stone crumb as facing of walls polyfoam is not allocated with the corresponding durability.
The newly-laid layer of decorative mix is processed in the desirable way.
Use figured rollers, various disposed objects to achievement of decorative effect, for example, a brush, the crumpled plastic bags, etc., or plaster tools (with use of special receptions).
For finishing of facades effects are popular: plaster bark beetle, fur coat, travertine, fragmentary stone. The detailed instruction for performance of various effects is in articles of the heading "Decorative Plaster".
As an example we will take performance of a decor "bark beetle".
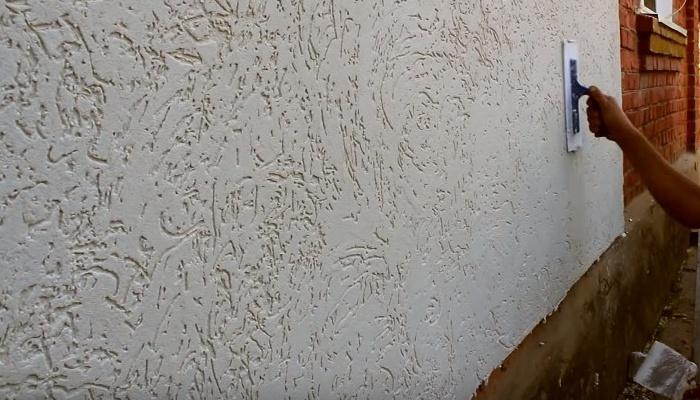
For this pattern special structures with filler of a certain fraction are necessary. An essence of a way in education the figured, reminding courses of a bark beetle, the flutes left in the grabbed solution rolling of granules of filler. Mix is applied with a trowel the layer equal on thickness to the size of fraction of large granules. For a facade it is 2.5-3.5 mm, for rooms – it is less (the size is specified by the producer). After drawing a layer, to it 5-10 minutes allow to dry up.
As soon as the hand ceases to stick to a layer surface, not it impose a plastic grater and carry out by her in the necessary direction. Slightly pressed filler grains clung by a grater are rolled on a layer, leaving flutes.
The direction of the movement of a grater can be rectilinear or (reeling) why different drawings as a result turn out.
After a covering a pattern of all surface evenly, solution is given time for that pebbles were recorded in a mix body. In half an hour carry out smoothing down by a trowel. At the same time sharp ledges smooth out. After drying of a layer it is painted over in one (usually for facades) or two colors.

Decorative plasters in rooms also cover with varnish or wax. On the street, as a rule, use only colourful structures. It have to be paints for external application. They are more resistant to UFL and temperature jumps, to form a strong film.
Care of decorative plaster finishing is simple. Most of structures is suitable for washing even with use of detergents.
Plaster of doorways and slopes
After replacement window or doorframes performance of slopes from polyfoam with plastering will be the best warming of the apertures formed between frames and a facade. It is possible to do slopes at once as soon as polyurethane foam dries.
On simplicity work reminds gypsum cardboard installation. Cut out preparations which paste to a wall on frame perimeter from sheets PPS (under a window sill it is also necessary to mount polyfoam. When glue dries, expansion bolt shields with a fungus are installed. Plaster of polyfoam is carried out also as it is described above (on solution put corners, attach strips of the reinforcing grid, etc.).
Not to soil a frame them paste over before foam works as a painting adhesive tape.
Consumption of front plaster on polyfoam
If plaster on polyfoam is carried out by front universal mix, then the expense on square meter will make 10 kg. Applying two views – the glue and leveling plaster, prepare on a square 4 and 6 kg respectively. The same expense – 9-10 kg will be in case of use of polymeric structure. From them 3.5-4 kg will be necessary for heater gluing, the others – on plastering on polyfoam. The consumption of the leveling plaster to you will help to calculate online the calculator.
Warming of the house polyfoam with each Ghat becomes more popular. Having got acquainted with how to plaster polyfoam what materials it is better to buy for a facade, than front warming more mainly than warming of the room, you will be able easily to solve many problems arising at repair or construction. The plastered thermal insulation will serve longer if it in time to tint and repair in case of violation of integrity of "armour". To your house it will be safer, and to you – is warmer and more comfortable in it.
 (yet there are no estimates)


 The mechanized plaster or manual, what is better and more favorable